Well, here goes nothing. This is my first try at "blogging" and I am still trying to figure out all the steps in creating a blog. Please bear with me as I try to make this work.
By way of introduction, I have been knitting and sewing since the mid-1960's but I never thought of combining these passions until I met Manon Salois. Manon is a wonderful fiber artist who authored "The Haute Couture of Cut and Sew", a book that focuses on Cut and Sew knits. When she offered classes teaching her techniques, I was able to attend four week-long sessions over the course of four years. I love to knit and I love to sew. Most of all, I love creating "one-of- a-kind" knits that combine all manner of fiber arts.
The Blue Butterfly Jacket was designed several years ago and combines knitting, sewing, beading, and embroidery. This jacket was my epiphany because as I constructed it, I realized the versatility of knit fabric and its endless possibilities.

The pattern was Vogue's Oscar de la Renta #2188. My favorite color combinations are blue and black. The jacket I envisioned was versatile and warm. The fabric needed to be fairly sturdy when knit because I wanted to add sequins and seed beads to the design.

Ultimately, after sampling numerous fabrics and color combinations, I chose turquoise and black ultra suede for the bands, a blue satin for the lining, and a bright multicolored cotton fabric contrast. The knit fabric is a turquoise chenille yarn and black superwash wool. The final addition was to be black bugle beads, black seed beads and black sequins. My test swatch produced a fabric that was dense, but still maintained the integrity of the butterfly design.

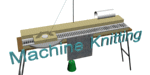
Because the jacket is "cut and sew" no real shaping is involved in the knit. Generally, the knit fabric simply has to be knit at a gauge that is pleasing, has good drape, and is wider and longer than the pattern piece. All pieces need to be properly blocked prior to cutting out the pattern pieces.
The first step was to cut out the pattern pieces and pin them in place. Care must be taken to line up the arrows on the patterns with a line of stitches, otherwise, the knit fabric will pull and have an "off" look. Once the pattern was pinned into place, I used a length of white contrast yarn and outlined the pattern with a long basting stitch. When I removed the pattern, the outline in contrast yarn was plainly visible. I then threaded my sewing machine with a contrasting color of thread and a stitched along inside of the yarn guide using a long basting stitch. That done, I removed the contrast yarn.

Now came the moment of truth. It was time to take a pair of scissors and cut out the outline of the piece leaving a one-half inch selvage. As a knitter who is used to shaping garments as I knit, this project was somewhat unnerving to me for two reasons --- (1) I just knew that the second I cut the knit it would immediately turn into a twisted mass of meaningless threads, and (2) I knew I was going to has scraps left over after the piece was cut which meant I was going to waste yarn. As true yarn addict, wasting yarn was a bad thing. So it was with great trepidation that I picked up the pair of scissors and poised them on the knit.
 It seemed like such a wonderful idea.....add a few beads and sequins to the knitted butterflies so that the finished jacket would catch the lights and give off a subtle sparkle. Simple really. All I had to do was string a few beads and anchor them to the knit.
 One down - 250+ more to go. It was going to be a long, long summer.....and autumn....and winter.
  In the photo of the right sleeve above, you can see the black stabilizer, the "stitches in the ditch", the serged edges, and the pressed seams.